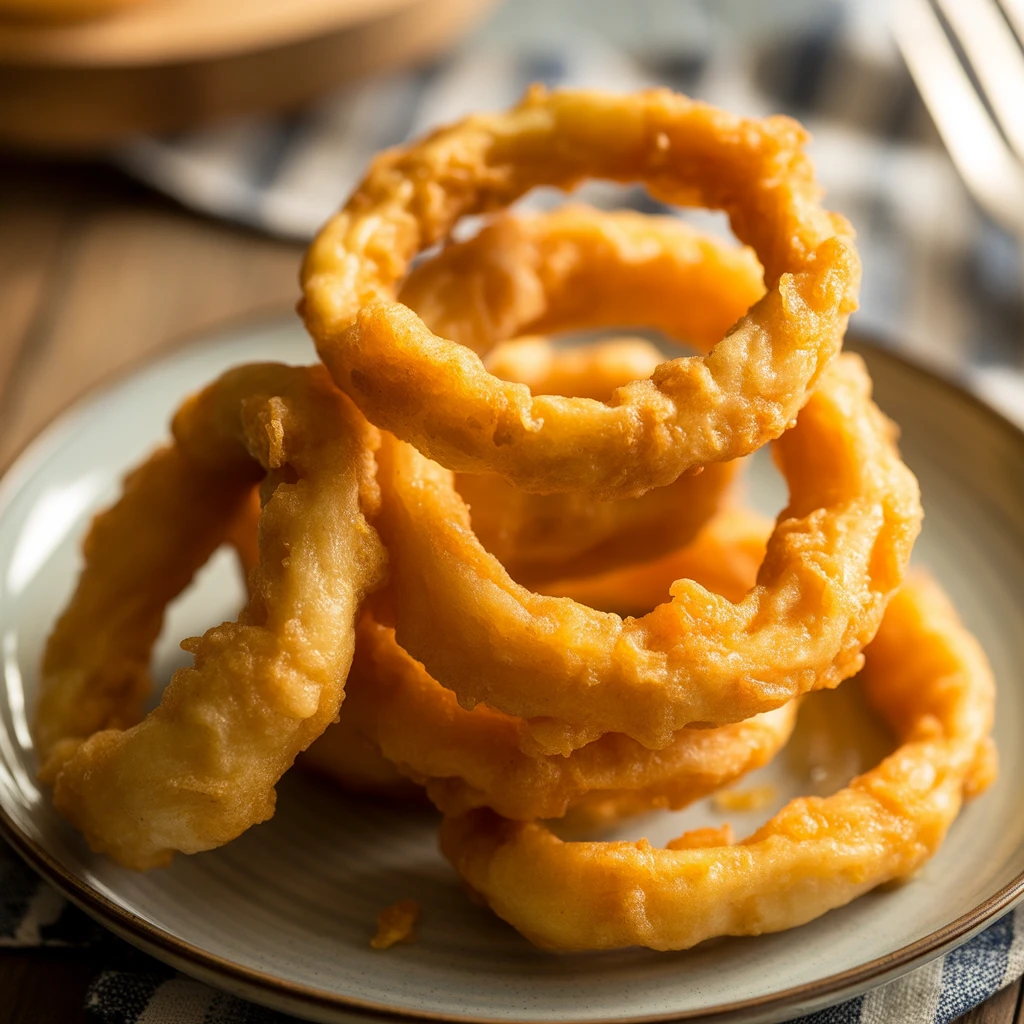
Foolproof Frying: Get Perfectly Crispy Onion Rings Every Time
There's something uniquely satisfying about a perfectly fried onion ring. That golden-brown, crunchy exterior giving way to a sweet, tender onion center – it's a culinary experience that elevates any meal or snack. While often considered a restaurant indulgence, mastering homemade
onion rings is surprisingly achievable, and with the right techniques, you can create a batch that rivals, or even surpasses, your favorite eatery. Forget soggy, greasy disappointments; this guide will unlock the secrets to consistently crispy, utterly addictive
onion rings that will make you a frying master.
The Quest for Crispy Perfection: Why Homemade Onion Rings Reign Supreme
For many,
onion rings complete the classic fried side dish trifecta, often battling French fries and tater tots for supremacy on our plates. What sets them apart is their unique texture and flavor profile: a delightful contrast between a robust, savory batter and the delicate sweetness of the onion within. While their origins are debated, early iterations, like those found in "The Art of Cookery Made Easy and Refined," hint at sophisticated blends of cream, flour, and even Parmesan cheese. Modern interpretations have largely settled on a battered and fried approach, often enhanced with breadcrumbs for that irresistible crunch.
The joy of homemade
onion rings isn't just about the taste; it's about the entire experience. Whipping up a batch at home is quick, easy, and undeniably delicious. They transform any casual gathering, turning a simple game night into a gourmet affair. Imagine the aroma filling your kitchen, the satisfying sizzle of fresh rings hitting the hot oil, and the immediate reward of that first perfect bite. It's a treat that feels luxurious but is surprisingly accessible to any home cook.
Essential Ingredients for Unforgettable Onion Rings
The foundation of any great dish lies in its ingredients, and
onion rings are no exception. Selecting the right components ensures optimal flavor and texture.
*
The Star: Onions. The first and most crucial ingredient. Opt for
yellow or
sweet onions. Their mild, naturally sweet flavor mellows beautifully during frying, creating the perfect counterpoint to the savory batter. One large onion can yield a surprising number of rings, often around 40, making them a cost-effective treat.
*
The Magic Elixir: Buttermilk. This isn't just any liquid for your batter; it's a game-changer. Buttermilk works wonders by tenderizing and subtly sweetening the onion slices, much like vinegar would, but with a richer, creamier texture. It's key to achieving that old-fashioned, deeply flavorful result often missing in simpler recipes.
*
The Crispy Shell: Flour & Panko Breadcrumbs.
*
All-Purpose Flour: Forms the base of your dredge and batter.
*
Baking Powder: A leavening agent that contributes to a lighter, airier batter, preventing it from becoming too dense.
*
Plain & Panko Breadcrumbs: While regular breadcrumbs add texture,
panko breadcrumbs are the secret weapon for an unparalleled crispiness. Their larger, flakier structure creates a more pronounced, airy crunch that stands up to frying without becoming heavy. Combining plain and panko ensures complete coverage and maximum textural delight.
*
The Binders & Seasonings:
*
Egg: Helps bind the batter components together.
*
Salt, Black Pepper, Garlic Powder: These essential seasonings elevate the flavor profile of both the batter and the final breadcrumb coating. Don't be shy with seasoning; it's what makes the
onion rings truly pop.
*
The Frying Medium: Oil. Use a neutral-flavored oil with a high smoke point, such as
canola oil or
vegetable oil. You'll need a generous amount to ensure the rings are fully submerged for even cooking.
For a deep dive into the specific ratios and steps for creating these masterpieces, check out our guide on
The Secret to Old-Fashioned Buttermilk Panko Onion Rings.
The Foolproof Frying Formula: Secrets to Crispy Onion Rings
Achieving that perfect, restaurant-quality crunch relies heavily on technique, especially when it comes to the frying process. Here’s how to ensure your
onion rings are flawless every time:
1. Preparation is Key
*
Slice & Separate: Begin by carefully slicing your sweet onions into rings of uniform thickness, about 1/4 to 1/3 inch. Then, gently separate them into individual rings.
*
Set Up Your Dredging Station: This is crucial for efficiency and even coating.
1. First bowl: Whisk together flour, baking powder, and a teaspoon of salt. Lightly dredge the raw onion rings in this mixture and set them on a wire rack to allow any excess to fall off. This initial flour coat helps the wet batter adhere better.
2. Second bowl: Whisk the egg and buttermilk, then gradually incorporate about half of the remaining flour mixture to create a smooth batter.
3. Third bowl: Combine plain breadcrumbs, panko breadcrumbs, the remaining salt, black pepper, and garlic powder.
*
Batter and Bread: Dredge the flour-coated rings in the wet batter, letting excess drip off, then immediately press them into the seasoned breadcrumb mixture. Ensure they are completely coated, gently pressing the crumbs onto both sides. Return them to the wire rack.
2. The Frying Masterclass
*
Oil Temperature is Paramount: This is perhaps the single most critical factor for crispy, non-greasy
onion rings. Heat your canola or vegetable oil in a heavy-bottomed pot or cast-iron skillet over medium heat. You MUST use a deep-fry thermometer to monitor the temperature closely, aiming for a consistent range between
350-375°F (175-190°C).
*
Too Cool (below 350°F): The rings will absorb too much oil, becoming heavy, greasy, and soggy.
*
Too Hot (above 375°F): The batter will burn rapidly on the outside, while the onion inside remains undercooked.
*
Don't Overcrowd the Pan: Frying in small batches is essential. Overcrowding drops the oil temperature significantly, leading to soggy results. Give each ring space to fry evenly and reach that golden-brown perfection.
*
Fry to Perfection: Fry the
onion rings for about 2-3 minutes per batch, or until they are a beautiful golden brown and crispy. Use a slotted spoon or spider tool to remove them from the oil.
*
Drain Properly: Transfer the fried rings to a fresh wire rack placed over a baking sheet lined with paper towels. This allows excess oil to drain away, maintaining crispiness. Season immediately with a sprinkle of salt if desired.
For more detailed instructions and troubleshooting tips on achieving restaurant-quality results, refer to
Master Crispy Homemade Onion Rings: Better Than Restaurants.
Elevate Your Onion Ring Experience: Tips & Serving Suggestions
Once you've mastered the basic technique, feel free to experiment and personalize your
onion rings.
*
Flavor Boosters: Add a pinch of cayenne pepper, smoked paprika, or a dash of your favorite herb blend to the batter or breadcrumb mixture for an extra kick. A touch of Parmesan cheese in the breading can also add a delightful umami note, harkening back to those early recipes.
*
Dipping Delights: While classic ketchup is always a winner, elevate your dipping game. Consider a zesty sriracha aioli, a creamy ranch dressing, a smoky BBQ sauce, or even a homemade honey mustard. The possibilities are endless!
*
Perfect Pairings: Onion rings are incredibly versatile. They make an unbeatable sidekick to juicy hamburgers, slow cooker pulled pork sandwiches, or any type of BBQ feast. But don't stop there! Try them as a fun, crunchy salad topper, or simply enjoy them as a standalone snack while watching your favorite game with friends. They can even make an unexpected but delicious addition to a breakfast burrito or sandwich.
*
Serving Warmth: For best results, serve
onion rings immediately after frying. If you need to keep a batch warm while frying others, place them on a wire rack in a warm oven (around 200°F / 95°C) for a short period. Avoid stacking them, as this can trap steam and lead to sogginess.
Conclusion
Making perfectly crispy, sweet, and utterly addictive
onion rings at home is not just a dream – it’s a delicious reality waiting to happen in your kitchen. By understanding the critical role of onion selection, embracing the tenderizing power of buttermilk, and, most importantly, meticulously controlling your oil temperature, you're well on your way to frying foolproof batches every single time. These homemade delights are more than just a side dish; they're an experience, a fun appetizer for a gathering, or the ultimate snack for a cozy night in. So, grab your onions, heat that oil, and prepare to impress yourself and everyone lucky enough to share in your culinary triumph!